
With my earlier tests so far I had defined every element of the world in the editor and there was some special logic for floors and ceilings so that I didn’t have to specify each grid tile separately. That had two big drawbacks though: complexity and format-lock. I had by now 6 levels to expand the data structure tree and whenever I renamed a variable I’d loose the data that had been entered. Time to bring this to the next level.
My first goal was to dramatically simplify the level editing process. For me, that meant either writing a good editing plugin or getting it out of Unity into some other tool. I suddenly wondered, how “real” game designers define their worlds in games. And very soon I stumbled across Tiled, a near perfect fit tile-editor.
Tiled – 2D Map Editor
The basic concept is to define building blocks or tiles (inside a tileset .tsx file) that can then be placed onto a grid (tilemap .tmx file). Tiles can be cut from one big image or be added from individual images. The latter method was more convenient to me so I used all my paint.net drawing skills and created two tilesets: a master set with the basic buildings blocks, see below, and a deko set for deko objects.

Each tile has a size which allows to support also bigger multi-grid objects with an adequate representation. I use the type field to specify the name of the linked Unity prefab. In addition, and this is most powerful, one can define custom properties, which can be int, float, boolean, color, file or string types. They can be defined with a default value inside the tileset and then overwritten and extended inside the tilemap.
Once the tiles are defined, the tilemap can be drawn. Each tilemap represents a room for me. There are 4 types of layers available from which I utilize 3:
- I use group layers (the yellow folders) to specify floors inside the room.
- Tile layers typically contain areas of tiles that can quickly be drawn in this mode and don’t need custom properties (which is a restriction of this type, only the default tile properties apply).
- Object layers are my weapon of choice for individual objects since they are the most powerful. You still get easy snapping in image mode (hold the CTRL key while moving) but also full rotation and custom property controls.
The layer visibility switches are life savers to work efficiently inside the tool.
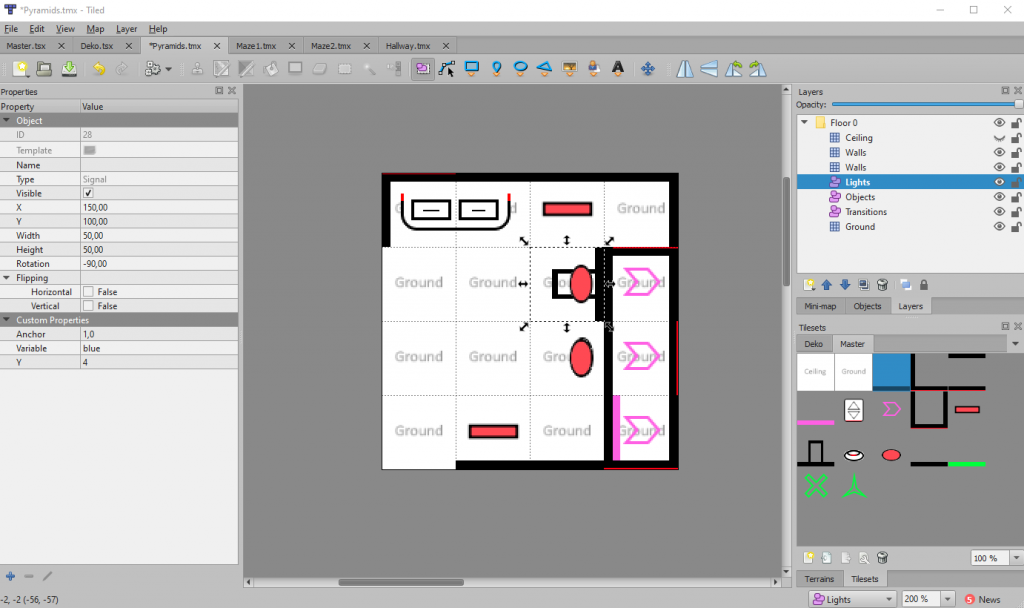
Properties support inheritance. They can be specified on higher levels and are then applied, if not overwritten, to all lower levels:
- map > layer > object > tile
In the screenshot above a signal light is selected from the lights layer. It specifies 3 customer properties to which we will get later. The bottom right shows all my available master tiles so far.
Unity Import
The native Tiled format is XML. While easy to read, even easier is JSON, which is available as an export option. And even nicer, there is a command line interface available to export programmatically. Why is that important? Roundtrip times of course. I am a huge advocate of very streamlined development environments. We freetime-enthusiasts don’t have much time to spare so every bit that can be saved is more time that can be used for tinkering somewhere else.
Two things I did next: define all JSON classes with help of the superb online documentation and create an importer which converts the JSON data to my internal own format as I decided against piggy-backing on the Tiled format. This way I still have complete freedom on the format and can just write an isolated importer / converter.
As a gimmick on top I created a couple of editor scripts:
- A SettingsProvider that allows me to specify my own editor settings
- An AssetRefresher, that periodically (to be set in my editor settings above) refreshes all Unity assets to check if there were file changes through external tools, eliminating the need to put the focus onto the Unity editor
- A TilemapConverter that hooks into the asset pipeline as an AssetPostprocessor listening to tilemap file changes
If tilemap files change, this automatically executes a command line call to Tiled.exe for each tmx file, triggering a conversion to JSON. In case the editor is running in play mode, a signal is sent to the world builder to reload the level. With this tool chain I can now draw levels in Tiled, press save and Unity will automatically live-update in the background showing the result.
Defining Objects
Having something on the tilemap is only one side of the coin. In 3D, some prefab needs to be instantiated now at the right position and rotation. Now it becomes a bit tricky. The most important concept to look out for are pivots.
- Objects I create myself are fully under my control and I can ensure the pivot is at the right place (I chose lower left corner) and all my rotation and placement routines take that into account.
- Third party objects now need to either be converted to fit (put a new GameObject as the parent) and potentially be rotated and scaled
Time to introduce an object attributes layer. If I was able to specify additional parameters for each prefab without the need to touch them I would be really flexible. It would even allow me to exchange the prefab with something else later rather quickly. The screenshot below shows the current options that the object lib supports: position, rotation, scale, height and pivot type. Pivots can come in three flavors: lower left, center and full center which so far caters for all objects I have and also supports Unity’s new snap libraries.
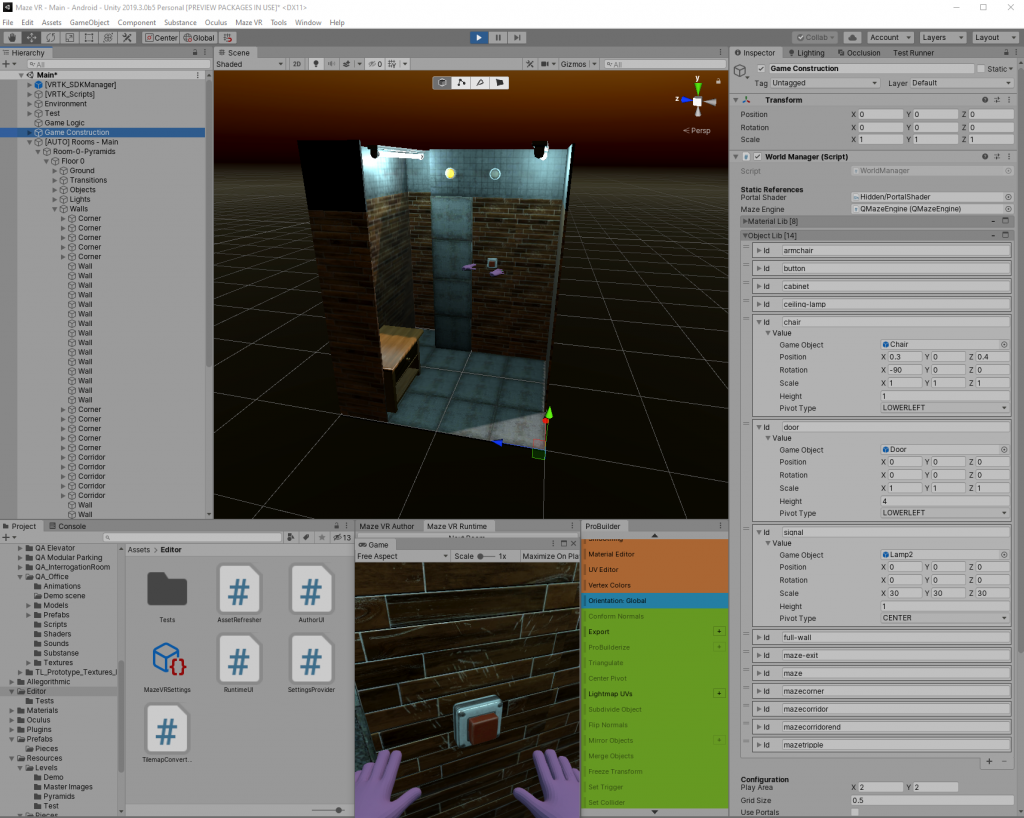
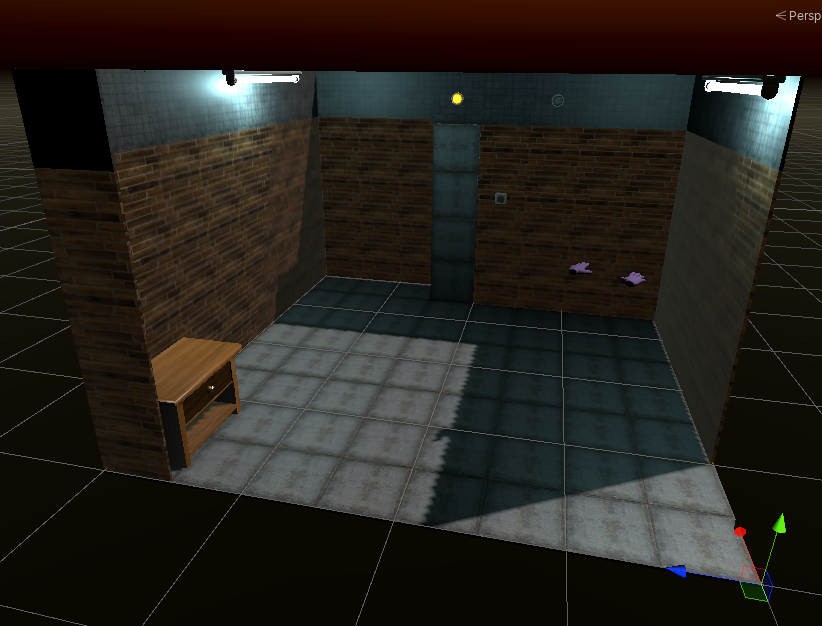
Objects that are not defined in the object lib can still be referenced by name if they are contained in a Resources folder. The screenshot shows the direct translation of the tilemap file above. And it illustrates the first additional concept: texturing.
In order to get materials onto the ground and walls, I introduced a material lib in addition to the object lib. It is for now a simple reference to a material somewhere in the project using a string id. Using a custom property called “Materials” I can now specify which material should be used for an object. Due to the inheritance I can put the property on the whole layer, the walls for example, and all walls will use the same material definition.
And speaking of definition: initially I had a uniform material only but it made the wall look very dull. The solution for now is a special materials syntax which gives much more freedom:
- take for example the walls with “bricks,*,tiles”
This defines that the walls should use the bricks material all the way up until the last element, which should instead use the tiles. You could also state “bricks,bricks,windows,*fence,tiles” or any other fancy ideas.
One more tip: the libs are dictionaries to be able to query by key. Unity cannot yet display dictionaries inside the inspector. I tried multiple solutions and the best I settled on is a great plugin by Rotary Heart called Serializable Dictionary.
Scalability
The last element to discuss in today’s blog is the varying size of the play area. My initial goal was that the 3D world should be as big as the play area supports. That means it needs to scale intelligently somehow. There are so many things to consider, but in order start small here the key ones I implemented, looking first at a scaled version of the identical scene from above:
This room now uses an 8 by 8 area instead of a 4 by 4. There are multiple mechanisms needed in order to achieve this:
- the room specifies a size for which it has been designed, default is 4 by 4, but this allows to support more elaborately designed rooms in the future if the play area is big enough
- before any scaling is done, an inventory of all neighbors is taken
- all objects that are on the outer sides of the room are automatically anchored to the sides
- all other objects are now linearly scaled to their new position
- objects in the tile map can define manual anchors, e.g. “1,0”, which means “anchor to the element one to the right”, ensuring that the door stays with the last corridor element, the button is next to the door and the lamps are on top of them, kind of reminds me of UI development
This results in the screenshot below:

Since the positions of all objects are simply interpolated to the new positions, we now get two types of holes in the layout which I treat separately. The first type is when two identical walls which were neighbors before get spaced apart after scaling. This can easily be detected and the gap be filled with more elements of them. It can have a uni-directional aspect like with the walls or an omni-directional one like the tiles forming the ground. In the latter case a rectangle is filled from the old to the new position.
The second type of hole is when a gap appears between two non-identical objects, e.g. a single wall and a corner wall. Only one should act as the filler now (the single wall), so this is a separate attribute.
I save the original state of the room as a backup in memory allowing me to dynamically change the play area and all the calculations are applied again freshly.
One thought on “Constructing scalable VR worlds”