What a week. While I was constantly building features into the Maze VR world builder I knew that one topic will not go away: the transitioning between the rooms. I had already thought about the three different options in a blog post before and looked at their pros and cons. More and more I get the feeling I should finally settle on one.
If it shall be possible to endlessly walk around without using teleports, the world around you must be warped, in the best case without you noticing. That is where the non-euclidean geometry comes into play. The issue is, you cannot trick geometry, only the eye. So it all comes down to which smokes and mirrors work best.
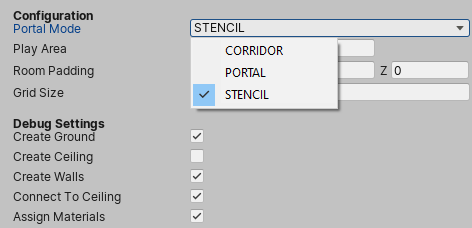
Maze VR can partially support three different modes as I was constantly experimenting. Right now, I can easily switch between them but I think once I got one working to perfection I’ll most likely drop the others.
Corridors
This method was very easy to implement. Only one room is active at a time and you must ensure there is enough overlap in each room so that one can be hidden and the other one shown. It does therefore not require special VR treatment but rather an intelligent room design and good room-swap trigger mechanics.

In the example above, the pink bar in the bottom right is the trigger point. As soon as it becomes visible to the camera the next room will be shown. The pink arrows indicate the trigger zone, which activates the trigger point and ensures the player is at the correct side of the wall. The new room does not have a wall at the point where the pink bar is, creating now an opening to walk through.
As one can easily see the main culprit of this technique is coping with rooms that have vastly different lighting conditions, as that will become a very visible change for the player. Level design is key in this case.
Portals
When I say portals I mean view-ports into a different part of the level. This means there is no overlap of geometry needed. As soon as the player touches a portal, he will be transported to the other room without him noticing.
To achieve that, all rooms are visible at once (or at least the ones that can be reached from the current one). Then a camera is placed into each and synchronized with the main camera that the player is controlling. This way each camera in each room is always at the position the player “would be in”, if he were in the other room.
This is then rendered into a RenderTexture and projected onto a quad, see animation below, where the imaginary door would be the one where the texture always changes.
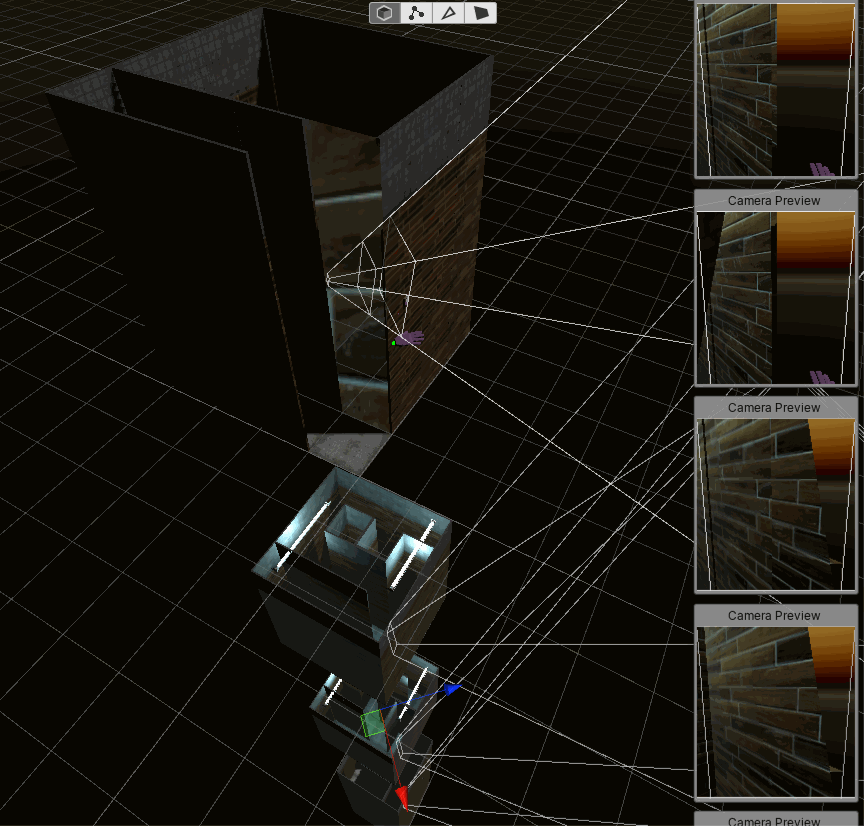
While from this perspective the texture seems a bit out of place, from the viewpoint of the player it is actually correct. Check out the smaller game view in the animation below to see that the perspective perfectly matches, creating the illusion the other room would really be there.
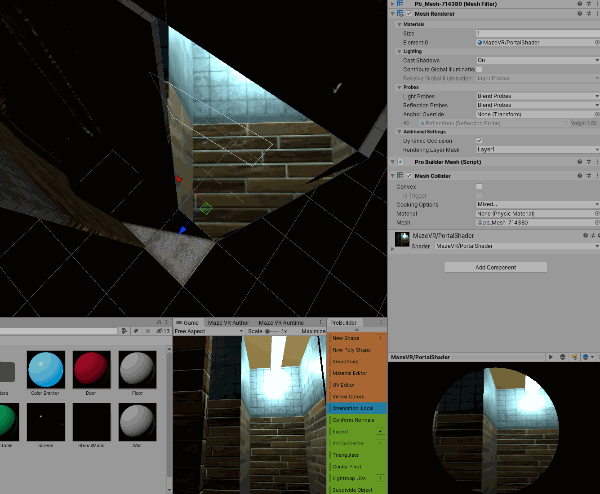
Thanks to the new snapping mechanism that I implemented earlier this week now also the portals snap nicely to the wall without any additional coding efforts.
I have not implemented yet the teleportation since the portal method seems too prohibitive to me for VR. There is just so much rendering going on. In VR one needs already two cameras for the initial view. Every room now adds two more, including post processing etc. And one cannot really reduce the resolution of the portal camera, as it otherwise seems out of place.
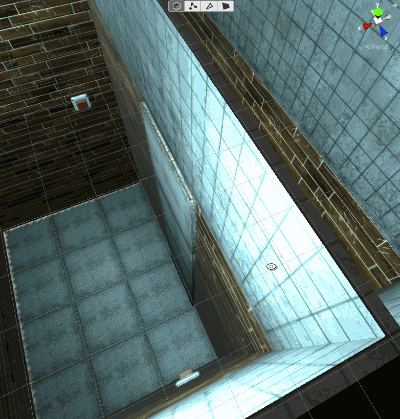
Stencil Buffer
I was dreading this method for a while. Not because it is not good but because it is not my home turf. I could not really wrap my head around it as I had never done shader development so far. And there are so many things to consider but let’s start step by step.
The basic method is like this:
- each object in the scene sets a stencil value in its shader run
- the stencil is basically an arbitrary number between 0-255
- each room has its own stencil value
- this will have the immediate effect that all objects that don’t have a stencil value of 0 become invisible
- these hidden objects should now be visible through a portal
- a special portal shader now does the opposite, it reads from the stencil buffer and only shows objects with a specific stencil value
- to get correct depth sorting, the RenderQueue needs to be set to a value between 2500-3000 (non-reserved segment of Unity, but before transparency), for now I settled on 2501 for objects in the current room and 2502 for objects in adjacent rooms
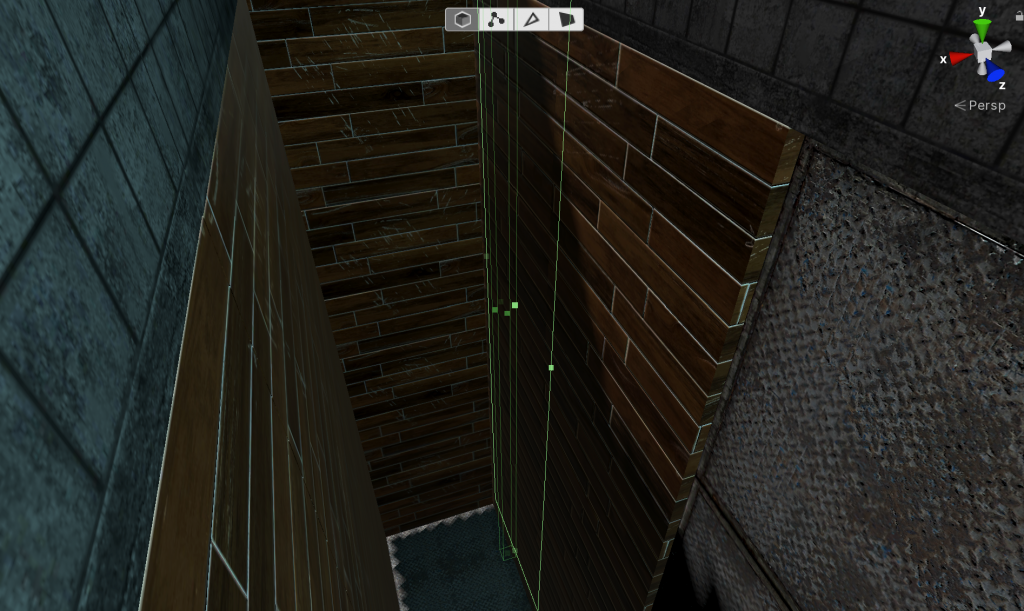
Let’s first see this in action. In the animation below you can see a solid wall initially and an empty room. Moving behind the wall will make the portal visible, punching a hole into the wall and revealing the already existing but so far invisible geometry of the second room. Magic!
It’s now easy to attach a trigger to the portal and when the player touches it then the active room is switched. What does switching mean? Right now I am setting the stencil of the active room to 0 and that of the other rooms to their original value. This will not work for VR anymore since both eyes can be in different rooms at the same time but that is for a later discussion.
Shaders
My dreaded topic. Luckily, there is some great material out there to learn. I strongly recommend the different parts of Ronja’s tutorials and shader 101. Also, if you are using Unity, Michael Grönert created an awesome free asset called 3D Game Card which will kick-start your understanding a lot. I still wonder about some of the Unity design decisions and I suspect I will learn about many more things I am not yet aware of down the road, but for a start here we go.
Basically shaders in Unity are simple collections of properties on the intended shader behavior (show shadows or not, be aware of other objects or not…) and relatively short shader functions. Properties can be exposed in the inspector and manipulated from the outside, e.g. the color, or the stencil value.
For some reason there does not seem to be an easy extension model for shaders. Adding the stencil magic for objects to set their stencil value actually requires adding these simple lines to a shader:
[IntRange] _StencilMask("Stencil Mask", Range(0, 255)) = 0

Stencil {
	Ref[_StencilMask]
	Comp equal
	Pass keep
	Fail keep
}
The mask / portal shader is then simply the opposite:
Stencil {
	Ref[_StencilMask]
	Comp always
	Pass replace
}
Now comes the part I am struggling with. I am using the Universal Render Pipeline (URP). There is a Lit shader which does all the display magic. How can I now inject my stencil logic into the existing shader? Normally in tutorials you will now find how to activate shadows, lighting etc. basically recreating a shader from scratch. Honestly, I don’t care and don’t want to recreate what the Unity experts already did.
When using the standard shader in Unity, there is a neat way to exchange the shader at runtime using shader replacement. Unfortunately, in the URP this is not supported anymore. Also it still would not solve the extension issue.
So after some thinking what I ended up doing was to grab the code of the Lit shader, create my own copy and add the lines in there (just fix the two non-qualified include paths 101/102). Works great! The only drawback I have so far: since I wanted to expose the stencil value in the inspector I had to deactivate the custom inspector.
World Building Simplifications
Concluding, stencils are awesome and my way forward. Settling on these makes it now much easier to design the levels in Tiled, as I don’t need the transition zones anymore but only draw in a portal. And programmatically I am already creating the back-portal (when the player turns around and wants to go back) in the target room. The tricky part with back-portals still is to hide the geometry covering the portal, as otherwise the player would now look at the wall. Due to the tile-based architecture of the room that should be an easy task tough later this week.
Another positive is, I basically don’t need overlapping geometry anymore making it also much easier to create multiple exits in a room with these space savings.
Up Next
Up next I will have to do the correct setup for VR when each eye is in a different room. I am thinking along the lines of providing two stencil Ids to each object in the future, one for each eye and the object shader can then use the correct one depending on the eye (see unity_StereoEyeIndex) that is being rendered. Another option would be to put a quad in front of each camera, each with a different portal stencil shader to reveal the fitting geometry.
Other topics include moving / throwing objects into other rooms (John of Unseen Diplomacy already has a nice solution for that using two materials at the same time, causing two draw calls, works great in first tests, now just need to automate the logic when this behavior is to be triggered) and navigation of NPCs.
2 thoughts on “Constructing Endlessness”