Since I am working on an Escape Room setting where the player should be allowed to freely walk around in virtual reality without teleporting, the play area becomes hugely important. First the terms:
- Boundary: The actual line the player has virtually drawn to limit the available play space
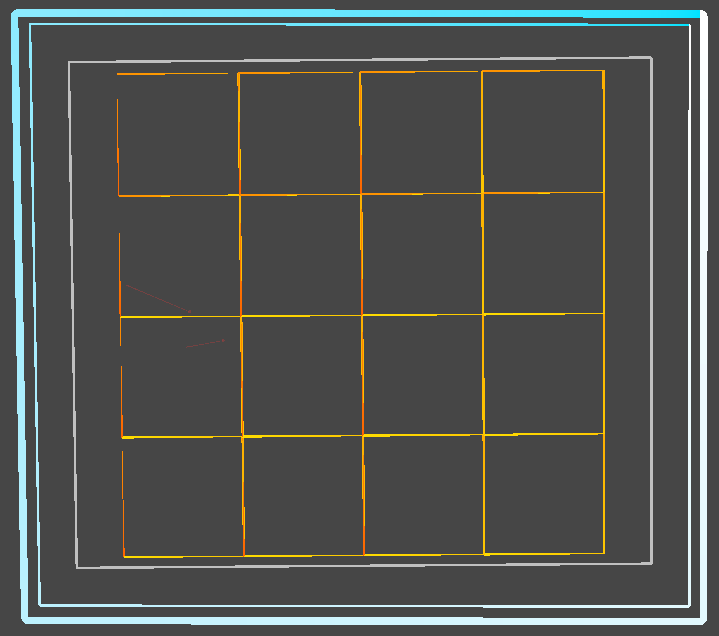
- Play area: The biggest possible rectangle that fits inside the boundary
Stable Fit
My actually very simple goal is now to create the world inside the play area. It cost me multiple days (ok to be fair, I also did solve tons of other problems in parallel, but this one really kept me busy).
Here is the catch: 0,0,0 can be anywhere and to make it even harder, the boundary can be rotated in any way around Y. The player can even dynamically change 0,0,0 by re-centering, e.g. long-pressing the Oculus button when using the Quest. I had actually hoped that VRTK would already solve this issue, but either I didn’t understand the concept or it does indeed not provide it.
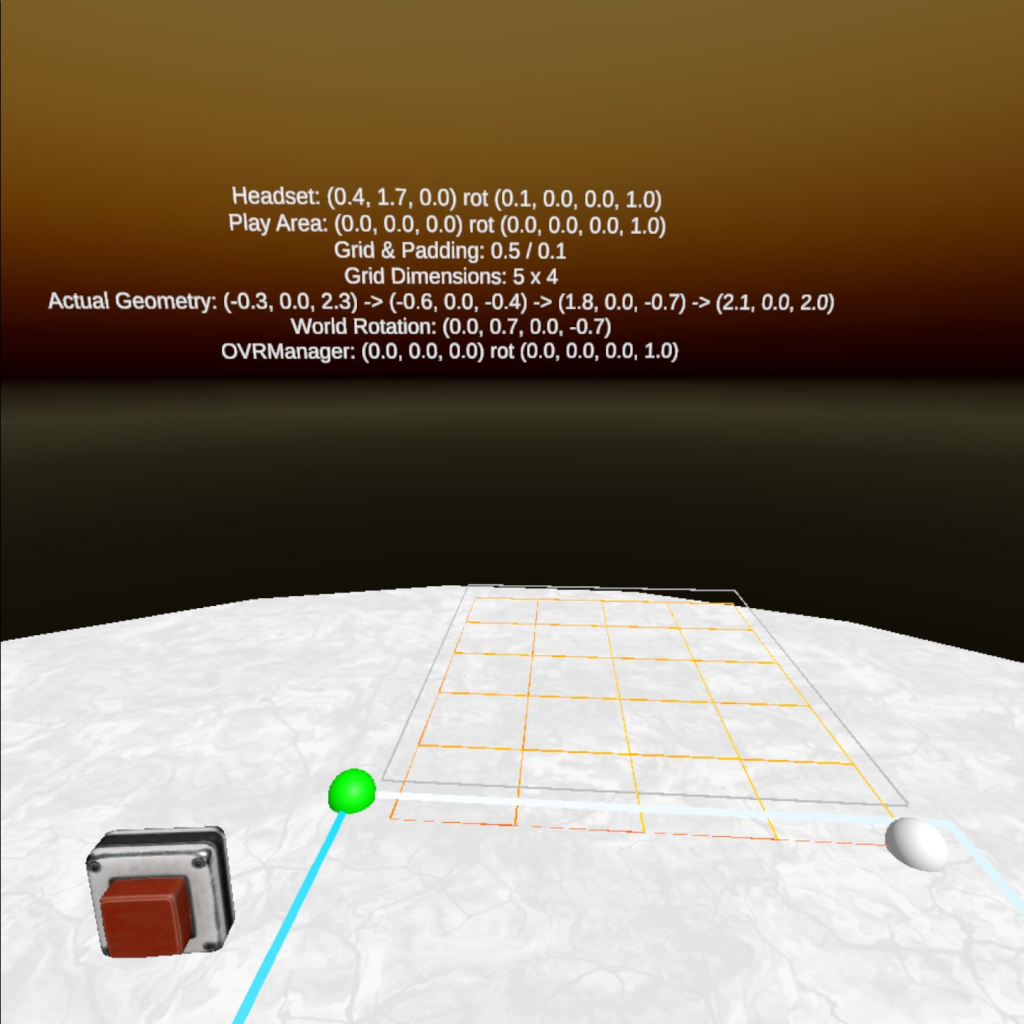
The picture below illustrates the basic issue (with some debug output on top, “geometry” is the interesting part):
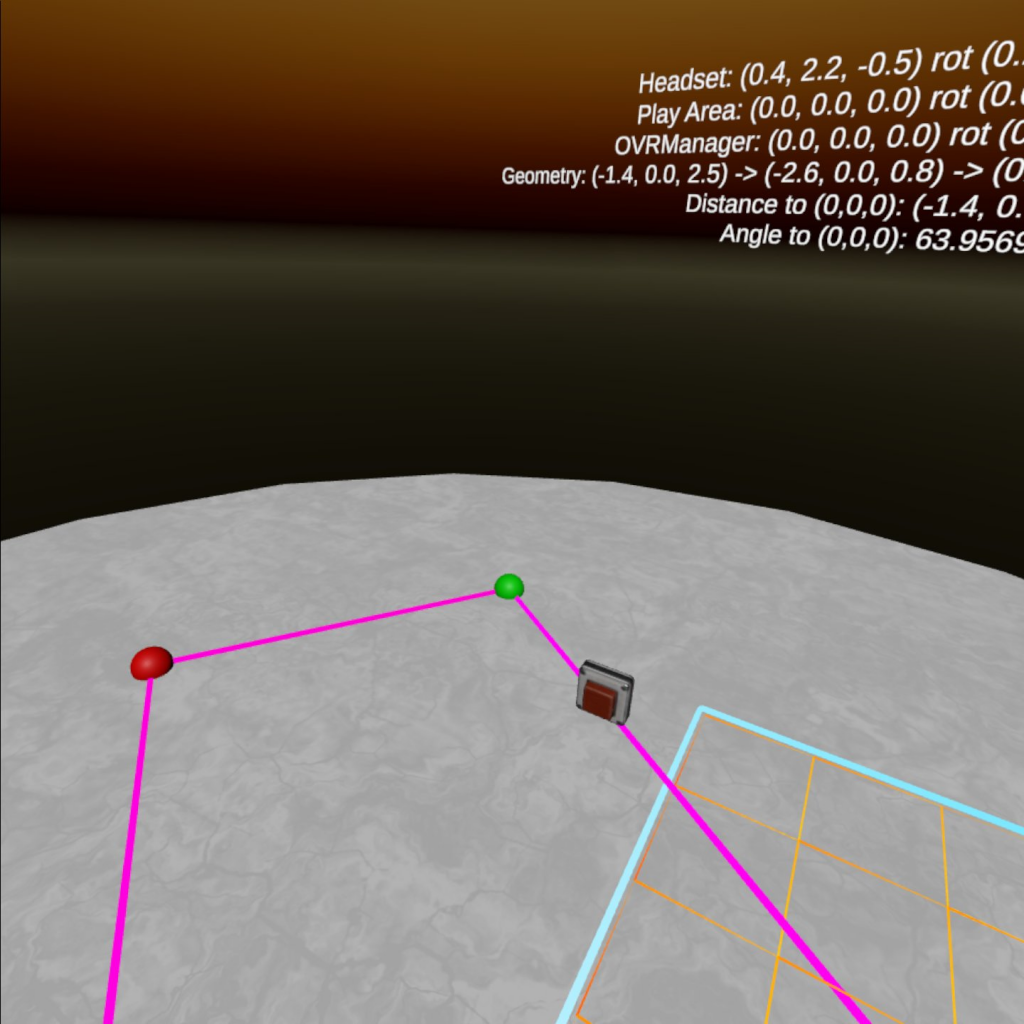
So my goal expanded: How can I calculate the correct rotation and offset to draw the world into the correct place, always being inside the purple boundary?
Rotation
Given 4 points of a rectangle, it is possible to calculate the rotation using arc tan (I am not a math guy, so this took me a while). A good approach for both can be found at DashW’s GitHub. Centering is luckily merely a question of something like:
new Vector2((x1 + x3) / 2, (y1 + y3) / 2)My approach is very similar (I found the above page only later unfortunately) except that I don’t rotate the camera but the constructed world. As mentioned in the comments on GitHub, the solution is actually deprecated. It turns out, Oculus added a new tracking origin type called “Stage” which does two things: it does the rotation calculation and will create the play area in a way that the rotation is zero. 0,0,0 will then be put into the center of the rectangle. That is convenient.
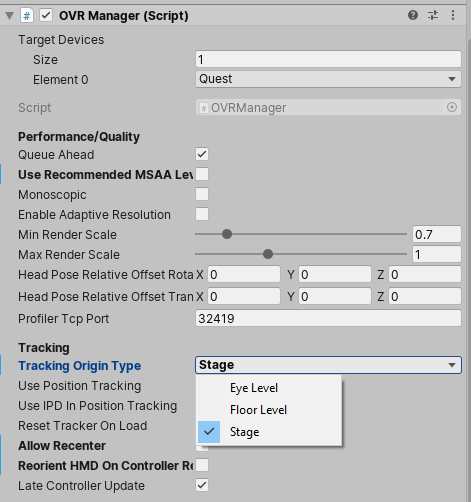
The catch is, it only works for Oculus Quest. If you have a Rift or other device or want to test locally, you are back to doing the math on your own. So I decided to actually keep my solution. I still set the tracking mode to Stage though as it brings one crucial benefit: it disables re-centering. The player cannot interfere with the play area any longer which is really important for scenarios where one needs a stable fit, e.g. placing furniture or, an Escape Room.
Position
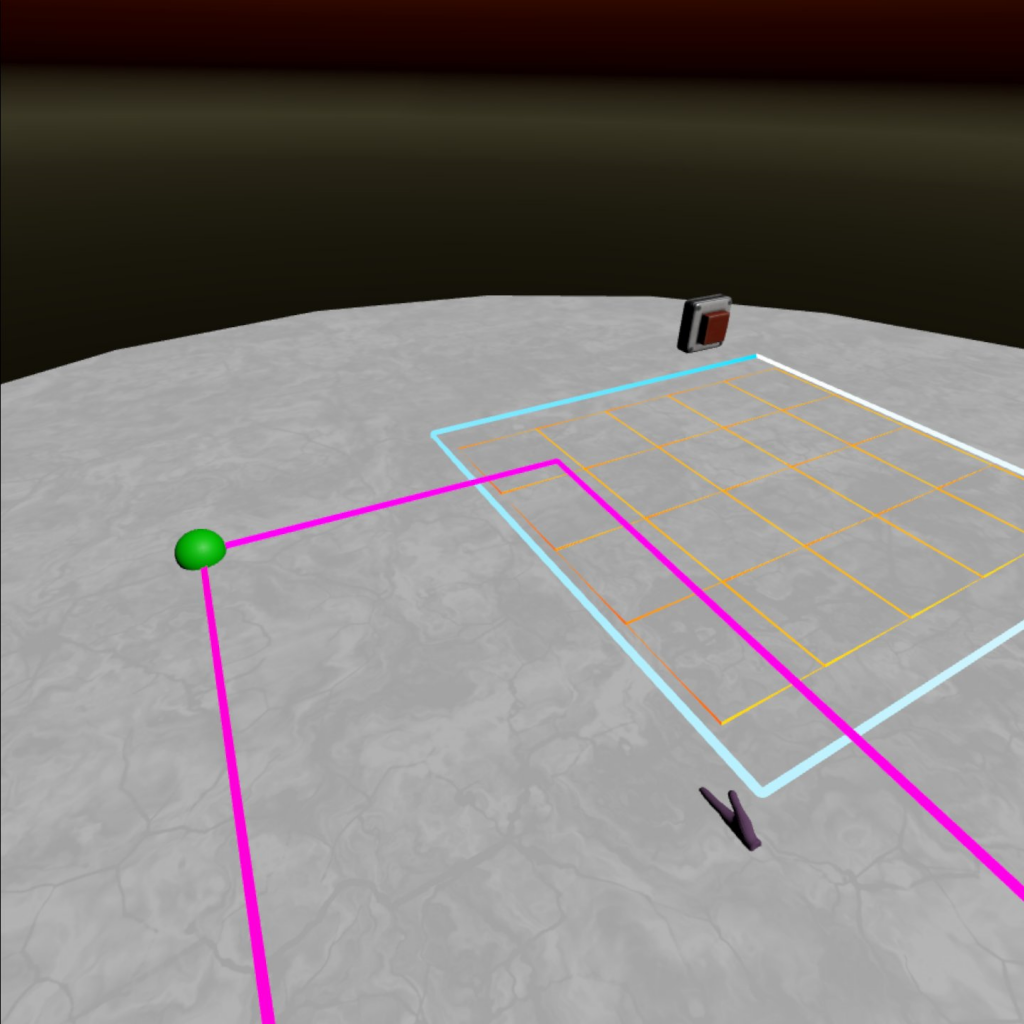
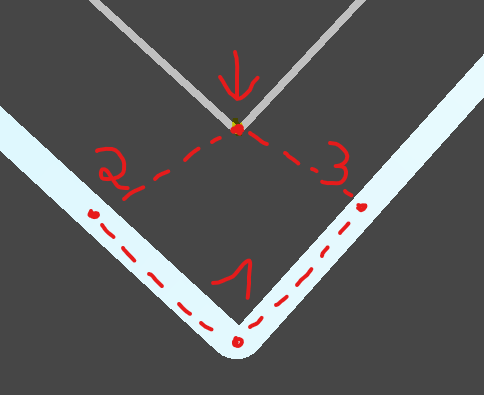
The next challenge was to identify the corner inside the boundary, that will represent X and Z pointing inside, so that the constructed world can be anchored there. I use a bit of a weird algorithm which I came up with after some trial and error and quite some automated tests.
// determine correct anchor point
float rot = GetPlayAreaRotation().eulerAngles.y;
int i = (rot >= 90 && rot < 270) ? (boundaries[0].x >= boundaries[1].x ? 3 : 2) : (boundaries[0].x >= boundaries[1].x ? 2 : 3);
As a result I get the index of the boundary corner which then is my offset for the world after rotation. Below an illustration of what happens when the wrong corner is picked.
Padding
Something that can really break the immersion in my opinion is when suddenly the Guardian system kicks in and reminds you that there is a physical world around you. This will happen automatically (and cannot be deactivated for non-developers) whenever the player gets close to it.
When constructing a world inside the boundary, this means that every time the user approaches a wall for example, the boundaries will pop up. To mitigate this, we can use the concept of padding by artificially reducing the size of the play area. This will of course make the gaming world slightly smaller but my measurements show that already 15 centimeters make a big difference.
A for me surprisingly interesting part was how to actually add the padding to the offset calculated one chapter earlier. I somehow had to move the point into X and Z direction.
After a bit of tinkering the solution is actually quite simple: Since we can calculate three points, the fourth one can be derived through (D being the unknown one):
AD = BC
(Dx - Ax, Dy - Ay) = (Cx - Bx, Cy - By)
Dx = Ax + Cx - Bx
Dy = Ay + Cy - By
Putting it all together
Once the math was solved I built a UI (more on that in another blog) so the player can now adjust the settings to his needs. The grid is created with a couple of line renderers which seems to work out just fine so far and it actually has a nice glowy touch out of the box. There are alternative ways of drawing lines as described here but for now I won’t bother with that as I quite like the result.

Right now the player can only change the padding but the editor already supports adjusting grid size as well which I might work on in a future version (imagine having wider floors to walk through for more convenience). Currently without any scaling adjustments its more like an artsy room generator 🙂
One thought on “VR Play Area & Stable Fit”